
If you are someone who likes to get a bit hands-on and love DIY-ing, then at one point in time you probably thought about welding yourself. Now, as a beginner, you might wonder how to weld steel to cast iron. And that is exactly what I will be covering in this article.
You can weld steel to cast iron but there are some key things you need to make sure of. First up is keeping cracks in control. This is one of the most important things. Then depending on what kind of weld you want to go with TIG or MIG welding can be done.
Not all cast iron alloys will act the same. And keeping the cracks in check is hardly an easy thing to do. Also, there are important steps and precautions you need to take like pre-heating. So, let’s get into all this in a bit more detail.
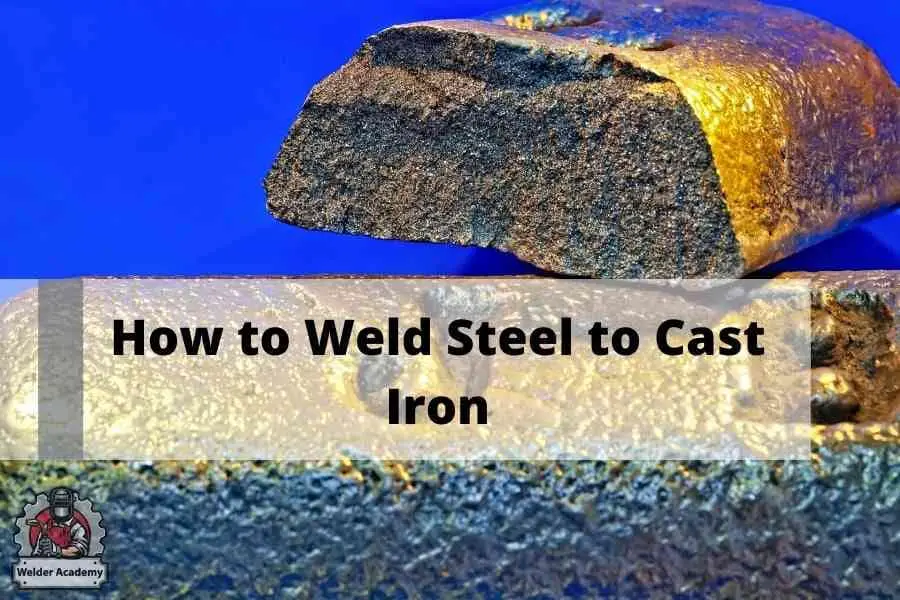
Welding Steel to Cast Iron
Alright, so let’s get to the meat of the topic. How do you weld steel to cast iron? There are a couple of ways that work. You need to make sure you are doing it the right way. That will ensure that the weld will hold for longer.
Before you go on to weld cast iron, it is better to know that most welders will actually avoid welding cast iron. This is because of the reasons I mentioned before. Cast iron is difficult to work with and can crack.
These cracks can cause the weld to fail over time which will, of course, be devastating. You can try using mechanical fasteners. This isn’t the prettiest solution but it lets you drill a hole for a bolt or pin. But before we go into the steps, let’s take a look at the two most common types of welds you are probably going to be doing.
Welding Steel to Cast Iron for Decorative Purposes
One of the common welds you will perform is for decorative purposes. These types of welds do not need to be super strong. All you need for decorative welding is to ‘stick’ the steel to the iron.
For these types of welds, you can use a stainless-steel wire along with an FCAW. FCAW stands for Flux-core Arc Welder. This is also called gasless MIG. Stainless steel has a high nickel content. That will make it stick together pretty well.
Welding Steel to Cast Iron When You Need a More Solid Bond
Sometimes you do not want to just go by with a normal bond. If you need the bond to be very sturdy and durable, you will need to do some real welding. In situations that call for a stronger connection using MIG or TIG welding is the way to go.
Make sure you use a nickel-based wire rod (also called Ni-rod) for this process. I suggest hitting up your local welding shop/supplier and getting professional suggestions from there. They are most likely to know what will work best and also can advise you on the right welding rods you should use.
Generally, steel is very weldable and easy to work with. Cast iron is the difficult part in this whole equation. You can try some unconventional methods to weld. Some will lay a nickel weld bead, actually. It will go on each piece separately and you weld over the beads and join it together.
Step-by-Step Guide to Welding Steel to Cast Iron
If you follow these steps, you should end up with a pretty solid weld for the most part. So, let’s get started.
Step 1 – Check the Parts Thoroughly
Your first step before you start any welding will be to actually check the parts. Make sure there are no signs of stress or cracks. Any signs of damage are a no-go. You will need to order a replacement part if you want the perfect weld in that case.
Step 2 – Check the Alloy
Next up is checking the alloy. You need to be 100% sure what you are working with is indeed cast iron. There are different kinds of alloys and each will act a bit differently. Know that some cast iron alloys are easier to weld.
- Grey Cast Iron
The most common type of cast iron is grey cast iron. The carbon will precipitate into the graphite flakes during the manufacturing process and will be either a ferrite or a pearlite crystalline microstructure.
This one is ductile and fairly weldable compared to other cast iron, for example, white cast iron. One challenge with working with grey cast iron is the graphite flakes. They will go into the weld pool and may cause metal embrittlement.
- Ductile Iron
Then we have ductile iron. This type of cast iron is less brittle. That is due to the microstructural differences. In fact, all the three types of alloys I will mention will have different spheroidal carbon microstructures thanks to the manufacturing process.
- White Cast Iron
White cast iron is actually considered un-weldable. It retains the carbon as iron carbide and it does not precipitate it out as graphite either. The structure is actually very brittle and hard.
So, make sure you know which one you have. Otherwise, the weld itself can come out poor if you have an iron alloy that requires a higher temperature but you did not know it did.
Step 3 – Clean, Clean, and Clean
Cleaning the surface is crucial when welding steel to cast iron. You need to remove any paint, dirt, oil or any other materials that may harm the welding process. You can also apply heat steadily to the weld area. This will ensure that any gas in the weld area of the base material is removed which is always a good thing.
Step 4 – Pre Heat
Since all cast irons can crack, pre heating is very important. With cast iron when you put it under stress, there are chances of it cracking. This will essentially ruin your weld. Controlling the heat during the entire welding process is one of the best things you can do to avoid it.
This process can be further broken down into more steps. They are preheating low-heat input and slow cooling. Basic school-level science will tell you that metal expands when it is heated. But if you heat the entire cast iron piece at the same rate you will avoid putting stress on it.
If you localize the heat on the affected zone, it will do the opposite. It will cause the metal to come under stress. When you preheat it, you can effectively reduce what is called the thermal gradient between the heat-affected zone and casting body.
You need a high temperature to preheat by high-temperature welding methods. So, a low-temperature heating process. This will reduce the heat input when there is no adequate preheating.
The cooling is also quite important. As a matter of fact, if you let it cool too fast, you will see cracks in the weld. Cooling does the opposite of heating. It will contract the metal. So, a slower and more controlled rate of cooling is your best bet here.
Step 5 – Using the right welding technique
Then comes another important step which is to actually choose which welding technique you are going to use. Base your choice of welding technique on the size and also the alloy. I will describe all of the welding techniques later on in this article. That will give you a better understanding on which one to go for.
Step 6 – Finishing Up
Once you get your weld done and are satisfied with it, you need to finish it up. There is one key thing to remember. When the weld itself starts to cool down, there can be tensile stress build-up.
The thermal contraction phase is the most likely time when you might see annoying cracks developing. And what have we learned so far? Cracks are bad! Here is the good news. There is a sure-fire way you can prevent cracks from developing in your welds.
You can use a technique known as peening. Don’t worry, I will go in-depth into the peening process a bit later as well. For now, let me tell you that it’s a technique that involves a ball peen hammer and making light strikes (there are other types of peeing too). This will lower the cracking chances.
Use this method when the metal you are welding is somewhat ductile. And of course, the final step that is left is controlled cooling. Apply heat to the weld periodically to slow the cooling rate.
Others might also opt to use an insulating material to control the cool down rate. But both work fine. I personally like the heat application method. The point being is whichever way you choose; you want to be able to control how fast the weld cools.
Can Cast Iron Be Difficult to Weld?
As you probably have gathered by now, cast iron can be a bit tricky to weld properly. This is especially true for beginners. Even some experienced welders may face problems if they do not follow the proper steps.
The main challenge when welding cast iron is it can crack. Which is something you do not want. But there are methods you can use to stop it from cracking and achieve a perfect weld each and every time.
Most of the common techniques will require proper heating and cooling and using the right welding rod as well. You also need to make sure to let the part cool gradually too.
Different Techniques You Can Use to Weld Steel to Cast Iron
If you do not know what I mean when I say MIG or TIG welding, this section will help you. There are actually welding techniques that are required in different scenarios. Let’s talk about all the different kinds of welding you can work with when working with cast iron.
MMA
MMA stands for Manual Metal Arc welding. This is one of the best ways to weld cast iron. But what you need to remember is to use the right welding rods. Do not worry, I will touch on different welding rods a bit later as well.
MMA welding is also called shielded welding and the electrodes that are used are based on the post-weld machining and also the color matching required. Nickel-based and iron-based electrodes are most common.
Nickel-based electrodes are the more common of the two and will give you a much more ductile weld. Another benefit of it is it reduces pre heating and HAZ cracking too.
Iron-based electrodes on the other hand are used more for minor casting repairs when you need to color match. It will give you a weld with a higher degree of carbon martensite.
TIG
For a clean weld, TIG welding can be used. Although TIG welding is not always preferred. This is because it has a high localized heating characteristic. And you need to be good at welding as well. The look of the final product will depend on your skill.
MIG
MIG welding is mostly used for thick and large materials (TIG can be used on large and thick materials as well) and will employ a consumable wire. This wire will pull double duty as a both filler and electrode. This one is much faster compared to TIG welding and is easier to learn.
I do not mean that an unskilled welder can do a fantastic job but MIG is definitely easier compared to TIG. Another cool benefit is it has low production cost and even shorter lead time. On top of all these, there is little cleaning and finishing up that needs to be done later as well.
The main downside as you may have guessed is that the finish is not as precise. And you do not get the same strength you get from TIG. Neither is MIG as clean as TIG welding.
MAG
MAG welding is done with a nickel consumable. For most applications you can do a pretty good job with an 80% argon to 20% CO2 gas.
Brazing
You can also use brazing for cast iron parts. This is a good potion because it has a very low impact on the actual base material. A filler rod needs to be used otherwise it will stick to the surface of the iron and will not dilute into the weld pool. It can happen due to the lower melting point or temperature of the filler.
When brazing you need to carefully clean the surface. Flux is used to stop oxides from forming. It will promote wetting and the filler will flow nicely over the base material itself. If you want to opt for TIG brazing, that is also possible. Use a lower amperage though. That will make sure you avoid melting the iron.
Oxy Acetylene Welding
This welding process, like arc welding, also uses an electrode. But the key difference here is this process will use an oxy acetylene torch to generate the heat. With arc welding, you would use an electrical current.
This process has low heat. Thus, you need to do some pre-heating, typically in the range of 600 degrees Celsius. Since it is a slow heating process (and has a low heat intensity), it will give you a large HAZ. However, slow heating has some benefits. You can prevent high-carbon martensite from forming.
Different Types of Welding Rods
You have seen me mention welding rods quite a lot by now. So, what are they? They are just basically filler material or electrodes that are used to join two base materials together when welding.
Nickel Rods (99%)
99% Nickel rods are the most effective when working with cast iron. These electrodes will give you the best results but are also more expensive compared to others. These rods will produce welds which can be machined.
These are the best for casting with a low to medium phosphorus content. They also produce a pretty malleable and soft weld deposit.
Nickel Rods (55%)
These are obviously less expensive than 99% nickel rods and great for any thick section repairs that needs to be done. And yes, these are malleable as well. With a lower coefficient expression means these will give you less cracks compared to 99% nickel rods. If you want the perfect welding rod to weld steel to cast iron, these ones will do just fine.
Steel Rods
Lastly, we have steel rods. Steel rods are the cheapest of all the three options but will not give you results as good as nickel. Steel rods are mostly used for filling and small repairs. These are not machinable and will produce pretty hard welds. One benefit of steel rods is the ease of color matching. Plus, it can also tolerate castings better.
I have another articletalking about best welding rods for Rusty Metal. Thech this article: Welding Rods For Rusty Metal: 5 Things To Look For
Peening: Strengthening Your Welds
In essence, the peening technique will help the strength of the weld. It will also help reduce the geometrical stress concentration. There are different types of peening too.
They are:
Shot Peening
Shot peening is the most common type of peening. It really is what it sounds like. In the shot peening process, you will basically hammer the metal surface by shooting spherical shots. You do not use a real gun, duh! An air gun is used.
The shot itself is another interesting aspect. There are different tiny particles. All are of various sizes and components too. Since an air gun is used to make the shot, a high-velocity air stream will be used to shoot the shots.
You have the choice to use either a mechanical and manual peening system. This will depend on the welding project and also the specific area you want to treat.
Needle Peening
For needle peening you will need two things. A descaling gun and multiple needles with a radial needle head. You impact the metal surface with multiple shots from the needle gun. There is a process to the madness though. You do not just shoot wherever you please.
For an effective needle peening process, you need to start from the weld and go to the bead. Make sure you do this in a crisscross motion as well. The needles are usually made of tool steel metal.
Roto Peening
Roto peening is also called flail peening. Here you will compress the surface area with multiple flaps which are shot coated and also extended to form a sort of a spindle. The flaps will contain shots that are mostly a tungsten-based carbide or metal. And it is embedded into a fiber wire mesh.
The tool will go into a drilling tool that rotates very fast. 3000 rpm to be specific. Then the flaps are brought closer and made to contact the surface which starts the whole peening process. You can determine the energy applied to the weld by the speed to the spindle.
Hammer Peening
Hammer peening is actually very similar to needle peening. There is one major difference though. It uses a metal rod instead of needles. A ball hammer is used on the surface which relieves stress between adjacent welds.
Peening and Weld Distortions
When metal expands or contracts you get weld distortions. Applying heat to one side of the metal will cause more distortion. The distortion is easy to reduce by simply alternating from one side to the other.
The mechanical and physical properties of the metal are factors that have an effect on the distortion of the metal. With Peening you can balance this shrinking and expanding. When you peen the weld bead, it will thin it out. This will reduce the stress when the metal is contracted.
The peening process will create a layer of compressed surface material. This will resist the development and further spread of cracks. Not only that. There are other benefits as well. It will also increase the resistance to failure due to fatigue, cavity erosion, strength fatigue and more.
Safety Precautions You Need to Take Before Welding
Before concluding this guide, I would like to tell you about some important safety precautions and best practices that are a must when welding. Following these will help keep you safe. Welding without the proper safety precautions can be dangerous.
So, never start welding without the proper gear. It is just not worth it. Besides, the precautions listed below are pretty easy to follow and are not much of a hassle.
- Wear the Right Gear
This is one of the most important precautions you can take. When welding, there are a lot of things that can go wrong. You can get electrocuted, burned and more. Wearing the right gear and PPE will ensure you are safe from all these.
Invest in a good PPE if you are self-employed. If you are an employee then your employer should provide you with it. Make sure you have the essentials like welding helmets, respirators, fire-resistant clothing, boots, gloves, ear, and eye protection. A little carefulness will go a long way in keeping you safe from harm.
- Get Proper Training
There is no substitute to proper training when welding. Without the proper training, you are most likely to hurt yourself and do a bad job welding. Proper training will help you to automatically know what hazards are involved and how you can avoid them. Also, your weld quality will improve as well. That is always a plus.
- Get Rid of Any Flammable Material from the Workshop
This one is the easiest to overlook. Welding produces sparks, heat, and also molten metal splatters. If they come in contact with something flammable you are certain to have a very bad time.
Check your surroundings and workshop for any flammable materials that can pose a danger. Immediately remove them from the vicinity and you will have a safer workspace.
The last thing you want to deal with when welding is a fire. It can not only be fatal but can also cause a lot of monetary damage. Then you need to deal with insurance and that is another hassle on its own. You can easily avoid all of these by having a proper workplace.
- Good Ventilation is a Must
I am going to repeat it again – good ventilation is a must. When you weld there can be a lot of fumes and gasses. Having a way to take care of these is very important, otherwise, it can be very harmful to your health.
Conclusion
There You Have It. Now you should have a pretty good idea about how to weld steel to cast iron. Remember the main challenge with welding steel to cast iron is cracks. This is the main reason why working with cast iron can be a bit problematic.
But if you follow the right steps and use the proper techniques you can get a pretty solid weld. Do not get discouraged if you are a beginner and your first try does not come out as good as you expected. Welding is a skill. And just like with any other skill, the more experience and practice you get the better your end results will be.